Sunday, March 11, 2018
USB Ni-MH Battery Charger Part 2-The Current Source
So I’ve looked around on the Web for a suitable design for my controllable high-side current source. I would like it to be as simple and cheap as possible. The first one is the usual Op Amp and FET combination current source circuit. But to power up an op amp using USB 5V I would need a rail-to-rail type, which is not that cheap. I stumbled upon this design. The answer also improved the initial design by adding a diode.
The idea is that, the voltage drop across R10 will be one diode drop, ~0.7V, so the current will be determined by the resistance of R10. Q1 is the ‘switch’ to control the current source from BQ2002. Q2 will adjust Vce accordingly to pass the current determined by R10. This also means that Q2 will have a big voltage across CE junction. 5V minus ~1.6V from battery, and 0.7V across R10, there’s still 2.7V across Q2, and we are passing around 0.7A. So that’s ~2W of power loss on Q2. This is not an efficient design, but it’s the simplest and easiest to be prototyped with my current stocks.
I needed to try this before buying any Power PNP. I used a configuration known as Quasi Complementary Pair to try my circuit. With a jellybean PNP and a Power NPN, they act as a Power PNP transistor. The circuit was commonly used during the old times when Power PNP had lower quality due to process technology. Anyway, my circuit worked, and I proceeded to buying a couple of TIP32 (as they are the most common parts and the cheapest….) and some BQ2002.
Monday, March 05, 2018
USB Ni-MH Battery Charger Part 1-The End and The Beginning
These series of updates will focus on building a Ni-MH battery charger powered from USB. The main motivation is this: my battery charger from Panasonic got destroyed.
It is a Panasonic BQ-CC16. I bought it in 2014-15 time with 4 of the Eneloop cells. My wireless mouse is using one of the cell and they last so long with one charge, so I only recharge them when about 2 of them are discharged. Anyway, my mouse was out of battery that day, so I replaced it with another cell, but all of them apparently were already discharged. So I brought out the charger, pop it the cells and switched on the power. I saw sparks and fire coming out form the charger and soon, my other devices connected to the same extension were out of power. I had just burnt my fuse in the extension. Luckily, the extension still works after I replaced the fuse, and it is cheap. But the charger is not….
See the scary burnt marks from the arcing inside the charger? I’ll think twice now for placing my handphone charger so near to me when I am sleeping…
It seems like the arcing happens at the trace near R02 and TP10. Very strange as they are not that close, and nobody has any complaints about this charger being that dangerous. So, maybe I misused the charger? I only charge like 3-4 times a year, so maybe some dusts have accumulated inside and caused the arcing? I would appreciate your comments if you guys have any idea how this happened…
The top side of the PCB. Seems well build to me. No flimsy dangling wires around. So why did it arc??? And the arc even blew my fuse…
Since I don’t know how the charger work, I can’t fix it. Maybe I’ll just connect some sort of DC supply to the secondary side.
Anyway, I initially wanted to buy a new charger, maybe multipurpose one, for Ni-MH and also Li-ion. But I thought that this would be a good project to build my own charger from scratch. I’ve been trying to build one, but the lack of motivation pushed me further and further, until this day…
I’ve looked up on several off the shelf ICs, the MAX712 and LTC4060. They seem easy to use and are quite promising. But their prices are to high for a possibly one off project like this. (Or would anyone wants to buy ? Hahaha) So I searched deeper and found BQ2002. It’s just a controller to switch a current source on and off based on the battery condition. So, I locked it down to this controller IC and started to research how to implement the current source. Stay tuned to Part 2, for my journey into the battery charger realm!
Sunday, October 30, 2016
Arduino Uninterruptible Power Supply (UPS) Improved
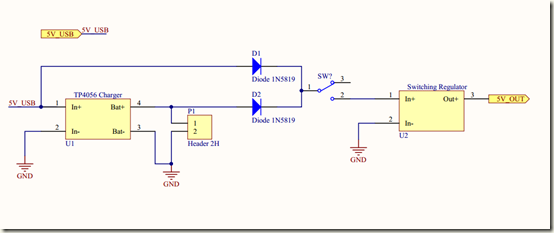
A reader left a comment on my UPS post, he asked me to share the ‘improved’ design.
I would not really categorise it as an ‘improved’ design because I simply removed the P-MOSFET.
I also added a switch when they would not want the Arduino to be powered on.
The UPS was meant to power up an Arduino Nano, from USB or a Li-Ion Battery.
I hope this blogpost will be helpful for anyone doing a small UPS for Arduino. Cheers
Friday, April 29, 2016
Magnetic Levitation with Arduino
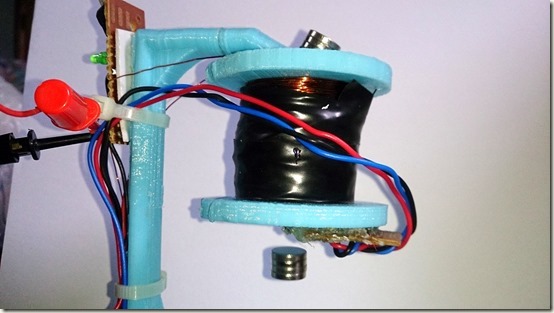
Hello guys! I posted my Magnetic Levitation project on Hackster.io! It is really a great site to share your own project!
Here is the link to my project: https://www.hackster.io/chanhj/magnetic-levitation-8c3ad0?ref=custom&ref_id=45065&offset=4

Even though I’ve posted some brief intro and instructions there, they are not very detailed. But then I am a lazy guy, so if you need more details, just leave a comment, maybe I can improve the post?
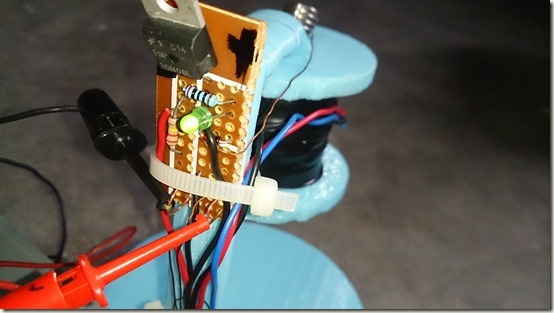
It's made with a U3503 Linear Hall Effect Sensor, a MOSFET and a LED. :D It is that simple.

My code is copied directly from another guy listed in my hackster project. All credits go to him, I only edited the PID parameters. However, his code does not compensate for the field generated by the coil itself, maybe I can research more on that, keep planning... Less doing, all the time...
I have since then found another levitation project to make, it’s a rotating globe, with blinking LEDs! Who doesn’t love LEDs right? Until next time, keep making things! :D


